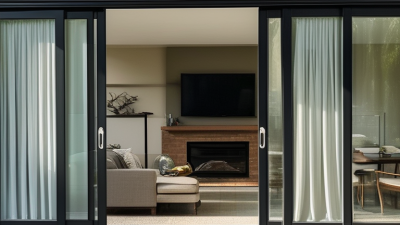






Measuring for replacement sliding doors is not a quick tape-and-order task. A few millimeters can create drafts, uneven rollers, or a lock that refuses to engage. The U.S. Department of Energy’s Energy Saver guidance reports that windows can represent 25–30% of residential heating and cooling energy use. Sliding doors contain larger glazed areas, so accurate sizing can influence comfort, air leakage, and long-term energy performance.
This guide follows practical replacement work and common industry measurement principles. Measure the opening width at the top, middle, and bottom. Record the smallest figure. Repeat the process vertically on the left, center, and right sides. Use the shortest height. Check the sill for slope, water damage, and soft timber. Then inspect whether the opening is square by comparing diagonal measurements. They should be close.
Do not measure only the existing panel. Its frame may be distorted, poorly installed, or built for a different replacement system. The Fenestration and Glazing Industry Alliance emphasizes standardized performance and installation practices, while ENERGY STAR guidance highlights the importance of proper fitting and sealing. These sources support a careful approach, but they cannot replace a site inspection. Every opening is slightly different. Sometimes, the old frame hides the real problem.
Before ordering, confirm frame depth, panel direction, track condition, screen clearance, and manufacturer tolerances. Keep written measurements and photographs beside the opening. A second person should verify them. It feels excessive. It is cheaper than remaking a door. This article explains how to measure replacement sliding doors with greater accuracy, while recognizing that unusual masonry, settling, or moisture damage may require professional assessment.
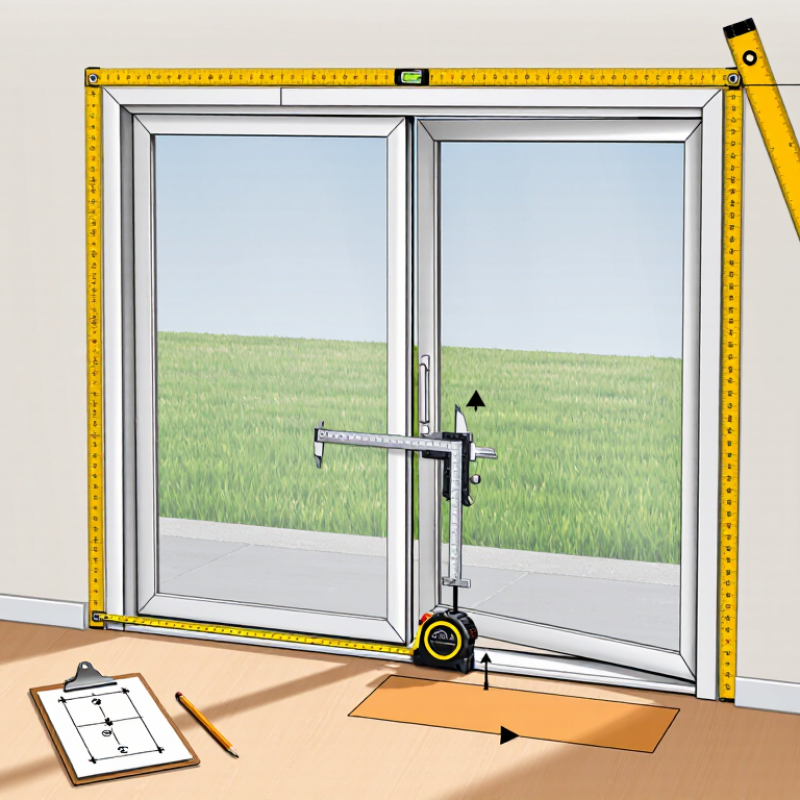
Measure the opening before ordering a replacement sliding door. Remove interior trim carefully, then measure the width at the top, middle, and bottom. Record the smallest measurement. Measure height at both sides and the center, using the shortest result. Check the wall depth, sill condition, and squareness with a level and tape measure. A diagonal difference above about 6 millimeters may signal an adjustment problem. Do not measure the old panel alone. The rough opening controls fit.
Identify the existing sliding door type before comparing sizes. It may be a two-panel, three-panel, pocket, or fixed-panel configuration. Check which panel moves, where the lock sits, and whether the frame is installed inside or behind the wall finish. Inspect rollers, tracks, drainage holes, and the sill for corrosion or water damage. The U.S. Department of Energy reports that windows can represent 25–30% of residential heating and cooling energy use. A poorly sealed sliding door can weaken comfort and efficiency, even when its glass looks sound. My field experience suggests that homeowners often overlook frame depth. That mistake can make a correctly sized panel unusable.
Tips: Write every measurement in millimeters and inches. Photograph each corner and the lock side. Recheck measurements after removing trim. If the opening is not square, ask a qualified installer to assess it before ordering. NFRC performance labels can help compare U-factor and solar heat gain, but the label does not correct a bad opening measurement.
How to Measure for Replacement Sliding Doors in 2026?
Gather a steel tape, level, pencil, camera, and notepad. A laser measure helps, but it cannot replace careful checking. The U.S. Department of Energy recommends measuring openings at the top, middle, and bottom. Record the smallest width. Measure height on the left, center, and right sides, then record the shortest result. Write measurements in millimeters and inches. One conversion mistake can ruin an otherwise accurate order.
Check more than the opening size. Measure the jamb depth from the interior trim to the exterior stop. Inspect the sill for water damage, soft wood, or uneven surfaces. Place a level across the sill and both jambs. A gap near the roller track may indicate settlement, not a defective door. Take clear photos of the lock side and sill. ASTM E2112 installation guidance emphasizes proper opening preparation and drainage, while the 2021 International Energy Conservation Code limits fenestration air leakage to 0.30 cfm per square foot. Poor measurements can undermine that performance.
Leave no guesswork. Do not measure the old panel alone. Measure the rough opening and the visible frame separately. I have seen homeowners record the widest width, believing extra clearance is helpful. That approach can create excessive shimming and air gaps. Recheck every figure with a second person. Mark obstacles, such as blinds, flooring, and exterior trim. Small details matter.
Replacing a sliding door starts with the opening, not the new door. Remove interior trim carefully, then expose the actual frame. Measure width at the top, middle, and bottom. Record each number to the nearest 1/8 inch. The smallest width usually controls the replacement size. Do not trust one measurement.
Measure height at the left side, center, and right side. Check from the sill or finished floor to the underside of the header. If flooring may change, note its thickness separately. A high sill can hide damage or create a misleading measurement. I once measured from the trim instead of the rough opening. It caused an avoidable ordering problem.
Squareness matters just as much as width and height. Measure both diagonals from corner to corner. Compare the results. A difference greater than about 1/8 inch may indicate a racked opening. Check the sill with a level and inspect both side jambs with a plumb tool. Photograph gaps, rot, cracked masonry, or bowed framing. These details help a contractor verify the opening before fabrication. Write every measurement on a simple sketch. Include the wall thickness and the direction the panel slides. Small recording mistakes happen, especially in dim rooms. Recheck unusual numbers before ordering.
Accurate measurement starts with the existing opening, not the old door panel. Measure width at the top, middle, and bottom, then record the smallest result. Repeat the process for height on both sides and at the center. Uneven walls are common. I still recheck every number.
Measure from the finished floor to the lowest point of the upper track, then compare that distance with the replacement frame dimensions. Check for screws, debris, raised flooring, or worn rollers that could reduce clearance.
The U.S. Department of Energy reports that windows and doors can influence roughly 25%–30% of household heating and cooling energy use, making correct installation important for comfort and air control.
Measure from the interior trim edge to the exterior stop, including any recesses or cladding. Do not assume the new frame matches the old one. Also measure operating space beside the opening. Handles may need several inches of free wall, while the sliding panel needs a clear travel path.
The National Fenestration Rating Council emphasizes accurate product and installation conditions when evaluating fenestration performance.
A tight fit may look efficient, but it can restrict movement and create pressure on the frame. Leave the final adjustment to a qualified installer.
Before ordering replacement sliding doors, verify every measurement at least twice. A tape measure can hide small errors. Record the rough opening width at the top, center, and sill. Measure height on the left, middle, and right. Write each number down immediately. Use the smallest width and height only when the installation guide requires it. A few millimeters can change the fit.
Check the opening depth from the interior finish to the exterior edge. Include flooring, trim, and any planned sill pan. Measure diagonals from corner to corner. If they differ, the opening is not square. That matters. A door may have the correct width but still bind during operation.
Use a level on both jambs and the sill. Check whether the existing frame is twisted, settled, or holding old sealant. Photos beside the tape can help you review details later.
Do not rely on a single person’s reading. Have another adult repeat the measurements without seeing your notes. Compare results and investigate any difference. I once measured a tight opening before removing interior trim, and the final dimension changed noticeably. That mistake was avoidable. Before placing the order, confirm rough opening size, finished opening size, frame depth, panel configuration, and installation clearance. Keep the measurement sheet with the order records. If the numbers seem unusual, pause and ask a qualified installer to inspect the opening. Custom sizing is expensive to correct.